


If you’re considering installing a 220V EV charger at home, you’re in for a bit of a project. It might sound complicated, but with the right tools and some basic knowledge, you can get it done. This guide will walk you through the steps of how to wire 220 EV charging, from understanding the electrical requirements to finalizing your installation. Let’s get started!
Key Takeaways
- Understand the electrical needs for your EV charger, including voltage and amperage.
- Make sure you have a suitable circuit breaker and the right gauge wiring for safety.
- Install the electrical conduit properly to protect your wiring.
- Securely connect the receptacle and test everything before finalizing.
- Follow safety precautions to avoid risks when working with electricity.
Understanding Electrical Requirements

Voltage and Amperage Needs
Okay, so before you even think about plugging in that shiny new EV charger, let’s talk volts and amps. Most EV chargers need a 220V-240V circuit. This is different from your regular 110V outlets. Think of it like this: a standard outlet is like a garden hose, while a 240V outlet is like a fire hose – more power, faster fill-up (or, in this case, charge!).
Now, amperage is how much electricity is flowing. Your car’s manual and the charger’s specs will tell you what amperage you need. Common EV charger amperages are 30A, 40A, or 50A. The higher the amperage, the faster your car will charge, but you need to make sure your wiring and breaker can handle it.
Circuit Breaker Specifications
Alright, let’s get into the nitty-gritty of circuit breakers. You can’t just slap any old breaker in there. You need a double-pole breaker that matches the amperage of your charger. A double-pole breaker takes up two slots in your breaker panel and provides the 240V you need.
It’s super important to get the right type of breaker for your panel. Square D, Siemens, and Eaton are common brands, and they each have different styles of breakers. Check your panel to see what kind you need. Also, make sure the breaker is rated for the amperage you’re planning to use. Don’t try to put a 50A charger on a 30A breaker – that’s a recipe for disaster!
Wiring Gauge Considerations
Wire gauge is all about thickness. The thicker the wire, the more current it can safely handle. For a 240V EV charger, you’ll typically need either 8-gauge or 6-gauge wire. For a 40A circuit, 8-gauge wire is often sufficient, but for a 50A circuit, you’ll likely need 6-gauge.
Here’s a quick guide, but always double-check local codes and the charger’s instructions:
| Amperage | Recommended Wire Gauge | Breaker Size |
|---|---|---|
| 30A | 10-gauge | 30A |
| 40A | 8-gauge | 40A |
| 50A | 6-gauge | 50A |
Keep in mind that longer wire runs might require even thicker wire to prevent voltage drop. It’s always a good idea to consult with a qualified electrician to make sure you’re using the right wire for your setup. Using the wrong gauge wire can lead to overheating and potentially a fire, so don’t skimp on this step!
Preparing for Installation
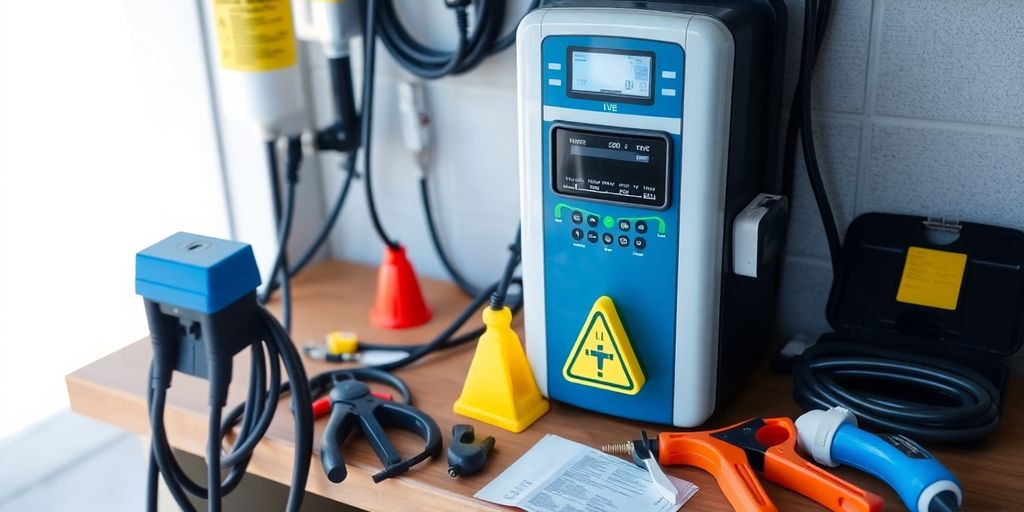
Alright, so you’ve decided to wire up a 220V EV charger. Good for you! But before you go ripping open walls and shocking yourself, let’s get prepped. This stage is all about making sure you have everything you need and that you’re doing it safely. Trust me, a little planning goes a long way.
Gathering Necessary Tools
Okay, tool time! You don’t want to be halfway through and realize you’re missing something crucial. Here’s a list to get you started:
- Voltage Tester: Absolutely essential to verify circuits are dead before you touch them. Don’t skip this!
- Wire Strippers/Cutters: For, you know, stripping and cutting wires. Different gauges require different settings, so make sure yours can handle the job.
- Pliers: Needle-nose and regular pliers will both come in handy for bending and manipulating wires.
- Screwdrivers: A variety of sizes, both flathead and Phillips head, because screws are jerks and never the same size.
- Electrical Tape: For insulating connections. Don’t cheap out on this; get the good stuff.
- Conduit Bender (if using rigid conduit): If you’re going with metal conduit, you’ll need this to make bends. PVC conduit can be bent with a heat gun.
- Fish Tape: To pull wires through the conduit. This thing is a lifesaver.
- Drill with various bits: For mounting the receptacle and running conduit.
- Level: To make sure everything is straight and professional-looking.
- Safety Glasses: Protect your eyes! Seriously.
- Gloves: Insulated gloves are a good idea for added protection.
Choosing the Right Location
Location, location, location! Where you put your EV charger matters. Here are some things to consider:
- Proximity to the Breaker Panel: The closer, the better. Less conduit, less wire, less voltage drop. Makes sense, right?
- Accessibility to the Vehicle: Can you easily reach the charging port without stretching the cord to its limit? Think about different parking scenarios.
- Indoor vs. Outdoor: If it’s outdoors, you’ll need a weatherproof receptacle and enclosure. Indoors is generally easier.
- Clearance: Make sure there’s enough space around the charger for easy access and ventilation. You don’t want to cram it into a tiny corner.
- Mounting Surface: Is the wall sturdy enough to support the charger? You might need to add some extra bracing.
Safety Precautions
Alright, let’s talk safety. Electricity is not something to mess around with. Follow these precautions, and you’ll greatly reduce your risk of getting zapped.
- Turn Off the Power: This should be obvious, but I’m saying it anyway. Turn off the breaker that supplies the circuit you’ll be working on. Double-check with your voltage tester.
- Wear Safety Gear: Safety glasses and gloves are a must. Don’t be a hero.
- Work in a Dry Area: Water and electricity don’t mix. If it’s raining, wait for a dry day.
- Don’t Work Alone: Having someone nearby in case of an emergency is always a good idea.
- Know Your Limits: If you’re not comfortable with any part of the process, hire a qualified electrician. It’s better to be safe than sorry.
- Double-Check Everything: Before you turn the power back on, go over all your connections and make sure everything is tight and secure.
By taking these precautions, you’re setting yourself up for a safe and successful installation. Now, let’s move on to the next step!
Checking Your Breaker Panel
Before you even think about running wires, you gotta check your breaker panel. This is where the magic (and potential danger) happens. You need to make sure your panel can handle the extra load of an EV charger. I mean, you don’t want to trip breakers every time you plug in your car, right?
Assessing Available Space
First things first, pop open that panel (carefully, of course – power off!). Take a good look inside. Do you have any empty slots for a new breaker? If not, you might be in trouble. Sometimes you can consolidate existing circuits by using tandem breakers (those skinny ones that fit two circuits in one slot), but that’s a whole other can of worms and depends on your panel’s compatibility. I had an old electric oven breaker that I repurposed, so look for opportunities like that. If your panel is completely full, you might need to upgrade to a larger one, which is a bigger job involving an electrician.
Identifying Compatible Breakers
Not all breakers are created equal. You need to make sure the new breaker you buy is the right type for your panel. Look for the brand name on the inside of the panel (like Square D, Siemens, or GE). The breaker must match the panel type. Using the wrong breaker can be a fire hazard, so don’t skimp on this step. A 40 amp dual pole breaker is what I used, but your needs may vary.
Understanding Panel Ratings
Your breaker panel has a maximum amperage rating. This is the total amount of electricity the panel can safely handle. You’ll find this number printed somewhere on the panel, usually on the inside of the door. Add up the amperage of all the breakers in your panel. If the total is close to or exceeds the panel’s rating, you’re pushing it. Adding a high-draw EV charger to an already maxed-out panel is a recipe for disaster. You might need to consult with an electrician to determine if your panel can handle the extra load, or if an upgrade is necessary. It’s better to be safe than sorry!
Running Electrical Conduit
Okay, so now we get to the part where we run the electrical conduit. This is where you’re basically creating a protected pathway for your wires to travel from your breaker panel to where you’ll be charging your EV. It’s not rocket science, but it does require some planning and careful execution. I messed this up the first time, so learn from my mistakes!
Selecting Conduit Type
There are a few different types of conduit you can use, but for most home EV charger installations, you’ll probably be looking at PVC or metal conduit. PVC is generally easier to work with because it’s lightweight and you can cut it with a simple saw. Metal conduit, like EMT, requires more specialized tools to cut and bend, but it offers better protection against physical damage. I went with PVC because I’m not a pro, and it was way easier to handle. Consider the environment where the conduit will be placed; if it’s exposed to potential impacts, metal might be a better choice.
Installing Conduit Properly
This is where things can get a little tricky. First, measure the distance you need to cover and plan your route. You’ll likely need to use conduit fittings like elbows and couplings to navigate corners and connect sections of conduit. Cut the conduit to the correct lengths using a PVC cutter or a hacksaw (for metal). Make sure to deburr the cut ends to prevent damage to the wires when you pull them through. When joining sections of PVC conduit, use PVC primer and cement to create a secure, watertight seal. For metal conduit, use appropriate fittings and connectors, tightening them securely.
Securing Conduit to Walls
Once you have your conduit run assembled, you need to secure it to the wall or other surfaces. Use conduit clamps or straps, spaced every few feet, to hold the conduit in place. Make sure the clamps are properly sized for the conduit you’re using. Use screws or anchors to attach the clamps to the wall, making sure they’re securely fastened. You don’t want your conduit sagging or coming loose over time. I used a stud finder to make sure I was screwing into something solid, not just drywall. Trust me, it makes a difference!
Connecting the Receptacle

Wiring the Receptacle
Okay, so you’ve run the conduit, pulled the wires, and now it’s time to actually connect that receptacle. This is where you make the final connections that will deliver power to your EV charger. First, make sure the power is still OFF at the main breaker. Seriously, double-check. We’re dealing with 220V here, and you don’t want any surprises.
Now, grab your trusty wire strippers and carefully strip about 1/2 inch of insulation from the end of each wire. You should have four wires: two hots (typically black and red), one neutral (white), and one ground (green or bare copper).
Each wire goes to a specific terminal on the receptacle. The two hot wires connect to the brass-colored terminals. It doesn’t really matter which hot wire goes to which brass terminal. The neutral wire connects to the silver-colored terminal, and the ground wire connects to the green terminal. Make sure each connection is super tight. A loose connection can cause all sorts of problems, from reduced charging speed to a fire hazard.
Testing Connections
Before you go any further, give everything a good visual inspection. Are all the wires securely connected to their terminals? Are there any stray strands of wire sticking out? Is the receptacle properly seated in the electrical box? If everything looks good, it’s time to test the connections. But before you do that, tuck the wires neatly into the electrical box. You don’t want them getting pinched or damaged when you mount the receptacle.
Now, carefully turn the breaker back ON. Use a multimeter to check the voltage at the receptacle. You should see around 220-240 volts between the two hot terminals, and around 110-120 volts between each hot terminal and the neutral terminal. If the voltage readings are off, turn the breaker back OFF and re-check your wiring.
Mounting the Receptacle
Once you’ve confirmed that the wiring is correct and the voltage is good, it’s time to mount the receptacle to the electrical box. Use the screws that came with the receptacle to secure it to the box. Don’t overtighten the screws, or you could crack the receptacle. Finally, install the cover plate. This will protect the receptacle from dust, moisture, and accidental damage. Now you’re ready to plug in your EV charger and start charging!
Finalizing the Installation
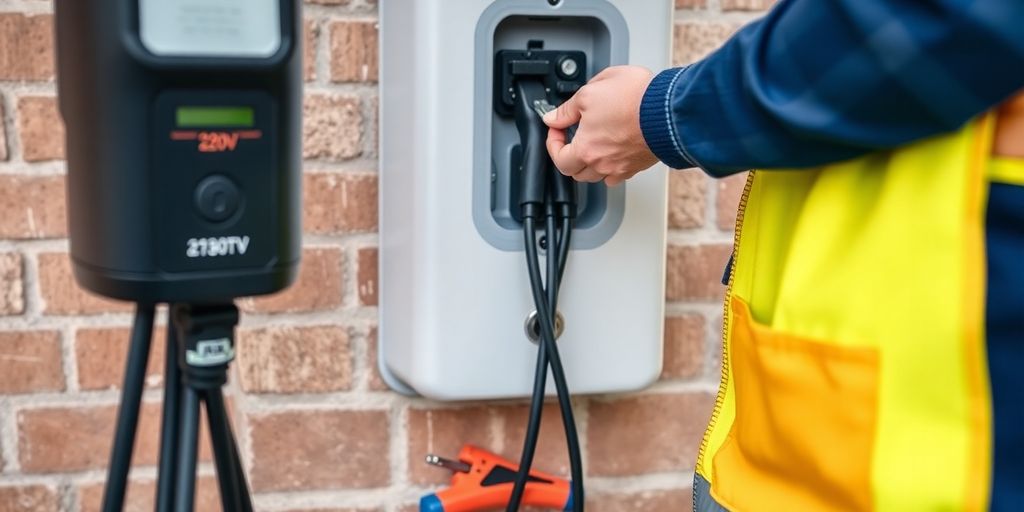
Powering On the Circuit
Alright, the moment of truth! After double-checking all your connections, it’s time to bring the power back. First, close up the electrical panel. Then, go to your main breaker and turn the power back on. Next, flip the breaker you just installed for the EV charger to the ‘on’ position. Listen for any weird noises or buzzing sounds coming from the panel or the receptacle. If everything sounds normal, proceed to the next step. If you hear anything unusual, immediately turn the breaker off and re-inspect your wiring.
Testing the Charger
Now that the circuit is live, it’s time to test the charger. Plug your EV charger into the newly installed receptacle. Your car should start charging. If it doesn’t, check the following:
- Make sure the charger is fully seated in the receptacle.
- Verify that your car’s charging settings are correct.
- Check the breaker again to ensure it hasn’t tripped.
If it still doesn’t work, you might have a wiring issue or a faulty charger. Time to get the multimeter out and start testing voltages.
Organizing Cables and Accessories
Okay, the charger is working, great! Now, let’s clean up the area. Nobody wants a bunch of cables lying around. Here are a few ideas:
- Use cable ties or Velcro straps to bundle the charging cable neatly.
- Install a cable management rack or holder to keep the cable off the floor.
- Consider a charger holster to store the charging connector when not in use.
Keeping everything organized not only looks better but also prevents tripping hazards and extends the life of your charging cable. Plus, it just makes the whole setup look more professional, right?
Troubleshooting Common Issues
Identifying Power Problems
Okay, so you’ve got your 220V EV charger all wired up, but it’s not working. Don’t panic! First things first, let’s check for the obvious. Is the breaker tripped? I know, I know, sounds simple, but it happens to the best of us. Reset it and see if that solves the problem. If it trips again immediately, that’s a big clue there’s a short somewhere. Time to turn off the breaker and start investigating the wiring. Use a multimeter to check the voltage at the receptacle. You should be getting around 220-240 volts. If you’re not getting anything, the problem is upstream, probably at the breaker panel. If you’re getting the right voltage, the issue might be with the charger itself.
Resolving Connection Issues
Loose connections are a common culprit. Make sure all the wires are securely fastened to the breaker, the receptacle, and any other connection points. Give them a good tug (gently!) to make sure they’re not going anywhere. Also, double-check that you’ve got the wiring right. Hot wires to the right terminals, neutral to neutral, and ground to ground. Swapping them can cause all sorts of problems. If you used wire nuts, make sure they’re twisted on tight and that no bare wire is exposed. Consider using crimp connectors for a more secure connection. I’ve had wire nuts come loose over time, especially with the vibration from the charger.
Ensuring Safety Compliance
Safety first, always! If you’re not comfortable working with electricity, call a qualified electrician. It’s not worth risking your life or burning down your house to save a few bucks. Make sure your installation meets all local electrical codes. This might involve things like:
- Using the correct gauge wire for the amperage.
- Properly grounding the circuit.
- Using a GFCI breaker for added protection.
If you’re unsure about any of this, get it inspected by a pro. It’s better to be safe than sorry. Also, keep all documentation related to the charger and the installation. This will be helpful if you ever need to troubleshoot problems in the future or if you sell your house.
Wrapping It Up
So there you have it! Installing a 220-volt EV charger isn’t as scary as it sounds. Sure, it takes some time and effort, but once you get the hang of it, it’s pretty straightforward. Just remember to double-check your local codes and maybe even call in a pro if you’re feeling unsure. Having a fast charger at home makes life a lot easier, especially if you drive a lot. Now you can charge your car overnight and start each day with a full battery. Thanks for sticking around, and happy charging!
Frequently Asked Questions
What tools do I need to install a 220V EV charger?
You’ll need some electrical conduit, 8-gauge wire, a 40-amp dual pole breaker, a 4-inch electrical box, screws or toggle bolts, and basic electrical tools like wire strippers and cutters.
How much power does an electric vehicle charger use?
An electric vehicle charger can draw up to 60 amps, which is more than typical household appliances like dryers or stoves.
Can I install the charger myself?
Yes, but be careful! If you’re not comfortable working with electricity, it’s best to hire a licensed electrician.
What should I check in my breaker panel before installation?
Make sure there’s enough space for the new breaker and that it matches the type of your existing breakers.
How long does it take to charge an electric vehicle?
Charging time can vary, but using a 220V charger will significantly speed up the process compared to a standard 110V outlet.
What if I encounter problems during installation?
If you run into issues like power problems or connection issues, check your wiring and connections. If you’re unsure, consult a professional.
